 method # 1 Tear and Conquer


Ok, here goes everyone. The first and most important part of sewing anything...the fabric. Why is it so important to find the sweet spot? What is a sweet spot anyway?
Why does it matter if you find the grain or not? Will it matter in 10 years? Will anybody know about this missed sweet spot other than me?
Yes, I do understand your reasoning and I have asked myself the same questions. So to answer the First one...The Sweet SPOT is very IMPORTANT to U.
The grain of your fabric, the threads that fall crosswise and up and down needs to be centered. This is what I call the SWEET SPOT. U will be working with a textile that is formed from thousands of small strings..if you cut your garment at an angle, cutting thru the sweet spot at an angle, then your garment will be catewompis. No this is not life threatening, however please take note****** Your product is only as good as the cut.*********
 So how do you prevent this from happening by finding your sweet spot..glad u asked. There are several ways to accomplish this. I will go over three of these methods.
Method #1....TEAR and CONQUER!
That's right tear...you are going to make a small cut on the salvage, you know that hard part of the edge of your fabric. The part that you can't tear by just pulling really really hard, yea that's called the SALVAGE.
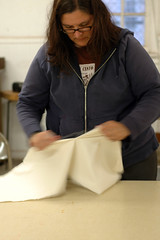 Image by Marshall Astor - Food Pornographer via Flickr
As hilarious as this sounds, this is a good way to find the sweet spot but if it is too Brutish and uncooth for your tastes...the next way is more refined and dignified.
Method #2 SNIPP IT
Now using your ruler, yep the one you used in grade school to draw pretty lines, and find the SWEET SPOT just like you would if you were cutting a 2 by 4 (lumber). Think T. One ruler resting on the other in the shape of a T. Upside down...The one ruler on the edge of your fabric with the salvage and the other crosswise on you fabric. Mark it with a pencil and snipp this line with your scissors. Takes a little more time, has less mental claifying benefits--getting that aggression out and all-- but does the trick.
If you possess a T square, I highly recommend using it. It does make you look Oh so much more professional in front of your family and friends.
Method #3 SLICE and DICE
 This is by far my favorite method of finding the sweet spot.
However you will need three peices of equipment or Sewing Gagets as I like to say...1. rotary cutter and 2. rotary cutter mat and 3. rotary cutter clear ruler.

Now for some of you this is very squeamish...using a rotary cutter and all the slicing and dicing of the fabric. However, with care you can accomplish this without harming the fabric, furniture, kitchen counters or YOURSELF. I have been using mine since it was first introduced...which was in the 80's I think. I still had all my hair and it was a nice shade of brown, so yea I'm pretty sure it was the 80's. Well back to the lesson at hand.. you will be placing the folded fabric with salvage edges together along the edge of the mat, keeping it straight. ( If this is difficult a little scotch tape will hold it down nicely and it doesn't matter if you slice thru it. )

Now your place your straight edge ruler made for the cutter along one of the marked lines closest to your edge and then with gentle, even pressure you roll the blade next to the ruler and across the fabric. TATA...you have a straight edge and you have your SWEET SPOT. Hint*******U need to read all instructions before using this sewing gaget. U need to use care and caution since it does have a rotary cutter that can roll. Be sure and CLOSE the Cutting BLADE after e
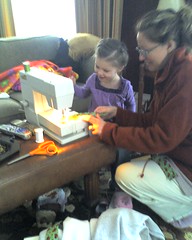 Image by billhd via Flickr
In conclusion, you have started on the road to sewing. I hope I made it fun and educational at the same time. I hope this helps . Look for Lesson #2 in a few days. Feel free to make comments...not rude ones I hope. I purchased all the items in this demo from local fabric stores nearby on sale. Make sure your rotary cutter is in excellent condition and that you can purchase extra blades at the store near you. Other blogs related...How I use my rotary cutter at momblognetwork.com

![Reblog this post [with Zemanta]](http://img.zemanta.com/reblog_e.png?x-id=50e1903d-1d0e-4c2e-b491-24556bd4503d)


swa....eet! grandma
ReplyDelete